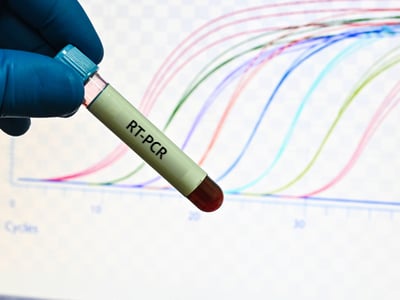
 Ever since Kary Mullis (that crazy guy, may he rest in peace) officially invented the polymerase chain reaction (PCR), an entire generation of molecular biology has exploded across the globe as scientists use PCR for a number of applications, from measuring gene expression to forensics. While the textbook technique is relatively simple, as I (and many other fellow researchers) can attest to from experience, producing an ideal PCR is far more challenging due to multiple factors.
Based on my own experiences and my conversations with proficient colleagues and friends, here are five very doable steps to help you design and streamline your PCR process, so you won’t suffer as many headaches! And at the very least, maybe we can help decrease the number of times you end up like this meme...
Step 1: The Environment Matters and So Do You
Globally speaking, we should always be mindful of our environment and keeping it clean, but this metaphor also extends to the workspace. A cleaner workspace reduces time lost to figuring out where the heck that P-20 went, prevents contamination, and improves your peace of mind when performing your PCR setup and run. Your techniques and equipment selection will also factor into the success of your PCR.
- Clean up that workspace
It's important to organize and sanitize the work space to improve workflow and comfort. When I worked in manufacturing, the quality control areas were set up to have defined spaces for thermal cyclers and clean preparation stations. Be mindful of where lab personnel have been, so they do not bring in excessive foreign DNA, and think about having a dedicated lab coat for PCR versus other activities. It also helps to designate a “clean” set of pipettors at your PCR station to further remove contamination risks.
- Sterile technique
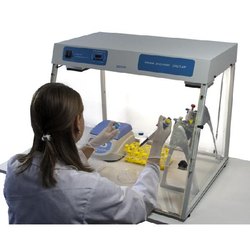 Where practical, you should consider working in either a laminar flow or biosafety cabinet and ensuring that area is separated from other zones in the lab. Part of cleanliness is also standardizing your pre-work and post-work cleaning procedures. Use alcohol and commercially available lab detergents that remove microorganisms, inhibitors, undesired DNA and RNA, and unwanted proteins that include DNase and RNase, from all work surfaces and equipment. If you are unable to use a hood, make sure you refrain from placing uncovered body parts over open tubes, plate wells, or any containers that hold your samples and reagents to reduce the possibility of contamination. Wear gloves that are DNase- and RNase-free and change them at any sign of contamination—if you touch something that isn’t your pipette or the reagent tubes, and you don’t remember if you cleaned that object, change!
- Aliquot and track
The label-maker you used to 5S your lab space may also be useful for creating labels for the boxes storing PCR reagents, and for categorizing all your samples and experiments. Using specialized labels (like these quarter-inch dots) can ease sample identification, and it's a lot easier to write on a label and then stick it to your microfuge tube than to write on the tube itself. Because there are multiple components that go into a PCR master mix, it would be wise to set up a system, either with a physical checklist or just tracking the tips from your pipette tip box as each ingredient is added, to keep track of your preparation.
- Pipette skills matter
Because of the difficulty and imprecision of pipetting small volumes, it is best to make a large volume of master mix and aliquot it immediately to avoid repeated freeze-thaw cycles. Of course, you will have to do some optimization experiments before finalizing your master mix recipe (or you can just get an optimized master mix), and that will require you to develop good pipetting practices to maximize reproducibility. Ensuring that your pipetting equipment is properly calibrated and regularly serviced will improve both accuracy and precision, and it will also help to use low retention pipette tips with sterile filters to dispense the appropriate volumes with minimal contamination. Due to the viscosity of many PCR reagents (mostly from the glycerol and additives used to stabilize the enzymes), it may be good practice for you to reverse pipette, which will allow you to dispense more accurate amounts with some practice. If you wish to practice, just use tap water or a 50% glycerol solution and an analytical balance to measure your consistency.
Step 2: Primer Design
Whether you are starting from a DNA, RNA, or cDNA template, proper primer design is required to ensure specific amplification of the correct sequence. Once you know, from using any number of genomic tools, the desired sequence, you can use the flanking sequences to begin designing an appropriate primer set that minimizes hairpins, primer dimers, or other secondary structures that could inhibit your PCR. You can use tools like the PrimerQuest Tool from IDT, which will optimize your final primer set. The usual rules of thumb include:
- Have the amount of guanine and cytosine residues, or GC content, between 40-60% to enhance specificity while reducing primer dimers;
- Unless you are doing customized mutagenesis, aim for the primer length to be between 15-30 nucleotides – more nucleotides can be added to the 5’ ends if needed to generate restriction sites and to accommodate the restriction endonuclease during digestions;
- Keep the melting temperature of the primers as close to each other as possible (I usually try to shoot for 55 °C) – you can use freely available calculators (like this melting temp sheet) or IDT’s tool for estimation.
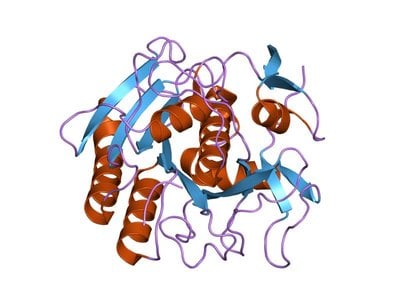
Step 3: Choose the Best Polymerase
Depending on if you are using a DNA or RNA template, and what you plan to do with that template, you will need to choose the right DNA polymerase and/or reverse transcriptase (which could be a separate reaction or part of a one-step master mix). There are some basic properties of DNA polymerases to consider:
 Thermal stability – how long can this polymerase survive at the denaturing temperature of 94-95 °C?
- Extension rate and temperature – how long does it take for this polymerase to add nucleotides?
- Fidelity – the error rate and proofreading ability of the polymerase
- Processivity – how long the polymerase stays attached to the template
You may also consider using a hot-start polymerase to enhance specific amplification. Hot-start polymerases are designed to remain inactive at ambient temperature so you can prepare the PCR without worrying about premature amplification. If the exact sequence of the amplified product is not required, a general Taq-based polymerase is sufficient. However, if you need an exact sequence or guarantee that a point mutation is maintained in the final sequence, a high-fidelity polymerase is best.
Step 4: Strategize and Optimize
If you are using a pre-optimized master mix, which contains the polymerase, dNTPs, and other necessary additives, all you must do is add the template, primers, and probes if necessary. However, that does mean you still have to optimize the amount of template and primer/probe mix anyway, so this step is necessary to improve the yield of your specific target sequence. The individual stages of PCR are standardized (Figure 1), so you will focus mostly on the amount of time for each step (particularly the extension step), the annealing and extension temperatures, and the amount of each ingredient in the final reaction.
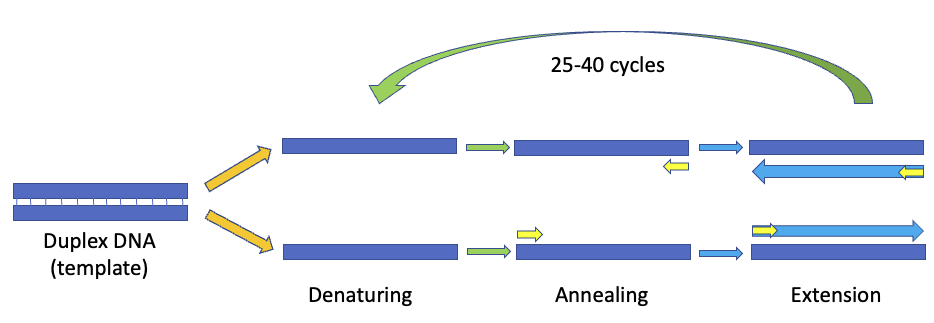
Figure 1: The PCR process consists of multiple cycles of denaturation (to split the duplex), annealing of the primers to each single strand, and extension to form new duplex DNA that can be used as templates for the subsequent cycle.
If you have access to a gradient thermal cycler (which can generate different temperatures for each row or column of wells on the heat block), that will help with the initial optimization experiment. Let’s look at the PCR components, in order of their addition into the reaction mix (other than the nuclease-free sterile deionized water to bring the final reaction up to volume):
- Buffer: Usually, catalog polymerases will come with an optimized buffer pH and salt concentration, so you won’t have to mess with this too much. However, you can sometimes alter the pH and salt, if necessary, by using different proportions of the buffer in the final mix, or just adding the desired component directly. If it is a hot-start polymerase, you will need to extend the initial denaturing time to activate it.
- dNTPs: The concentration range that is tolerated by PCR of each dNTP is between 20 to 200 μM, and this will depend on the length of your target amplicon and the desired final quantity. Magnesium concentration may have to be adjusted to match the dNTP concentration used.
 Magnesium: DNA polymerases need an extra cofactor for optimal activity, and to help stabilize the primers and template. Certain polymerases prefer MgSO4 to MgCl2, so check the specifications of your polymerase. Optimized master mixes usually already have the right amount of magnesium, but you can tinker around with the concentration to maximize yield.
- Primers: 30 seconds of annealing should be sufficient for most applications, but you should play around with the annealing temperature (preferably with the gradient cycler) to see which temperature maximizes yield. The amount of primer may also be optimized, usually at a final concentration of between 0.1 to 1 μM.
- Template: PCR should theoretically be able to amplify low amounts of DNA, but you can play around with the initial amount of template. Usually, you should not use more than 1 μg of template.
- Polymerase: The DNA polymerase has an optimal extension temperature, and the extension time will depend on whether it is a fast Taq or a proofreading enzyme. Consider approximately 30 second per kilobase for the fast enzyme, and about two minutes per kilobase for the proofreading enzyme.
Optimization involves not only the proper temperatures and timing at each stage, but also the number of cycles to create enough product while minimizing side reactions. A gradient cycler will help with the temperature setup, but more experiments will need to be done separately to check on timing and cycles. Practically, depending on the size of the heat block, you can run up to 96 separate optimization reactions simultaneously using one PCR program.
Step 5: Never Stop Learning!
 I learned many strategies and methods from speaking to more experienced folks and now have a greater appreciation for the nuances behind an optimized PCR. It really is amazing how much you can learn from Google, but there are publications out there that will also help and are good investments for your lab. You can build on your existing knowledge and adopt methods that others have successfully employed to further optimize your PCR workflow. Among these are:
- The original Maniatis protocol manuals
My mentors swore by these manuals, which clarify the principles behind the plasmid miniprep, DNA and RNA extraction, and other basic laboratory techniques. The newest editions include more current research techniques, including RNA interference. In context, preparing a pure DNA or RNA template will improve your PCR immensely. The manuals are available to order here, and you won’t be disappointed.
- The Journal of Visualized Experiments
As one of the leading producers of science videos, JoVE is a peer-reviewed journal and site that provides instruction on scientific protocols, often in video format. They have a huge collection of science videos, including this section on laboratory biology that includes primers (ha ha) on PCR. Which brings us to…
- JoVE’s article on PCR Protocol, Troubleshooting, and Optimization
Probably one of the most comprehensive guides I’ve seen, this article on PCR would have been super helpful when I was an undergraduate and graduate student many moons ago. I was able to supplement my experience with the guidelines from the JoVE article in writing this post, as the suggestions confirm a lot of what I had done to optimize my own reactions, plus taught me a few other things I never realized. This is a strong resource for basic protocol setup, more advanced methods like touchdown PCR, and troubleshooting. There are a few links in the article that no longer work, but the links to NCBI Primer BLAST and the Primer3 tool still work if you need additional help with primer design.
I sincerely hope that this post has been helpful to you, happy experimenting!